
That lingering, sour smell wafting from your dog’s favorite squeaky toy isn’t just unpleasant—it’s a sign that bacteria, saliva, and residual food particles have taken up permanent residence. Ignoring that stench means ignoring potential health risks for your pet.
Keeping pet toys clean is a fundamental part of responsible pet ownership. Routine cleaning prevents the buildup of harmful germs and extends the life of the toy. If you are struggling with persistent odors, this guide will show you exactly how to deodorize pet toys using safe, non-toxic methods that eliminate the smell at its source, not just mask it.
By following these expert, step-by-step instructions, you will confidently sanitize and refresh every toy in your pet’s collection, ensuring a cleaner, safer play environment.
Prerequisites: Gathering Your Non-Toxic Arsenal
Before diving into the cleaning process, gather these essential, pet-safe supplies. We prioritize non-toxic ingredients because pets inevitably lick and chew their toys, making harsh chemicals dangerous.
Required Materials:
- White distilled vinegar (The ultimate deodorizer)
- Baking soda (A powerful natural abrasive and odor absorber)
- Mild, unscented dish soap (Ensure it is dye-free)
- Large bucket or basin
- Old toothbrush or small scrub brush
- Mesh laundry bag (Optional, but highly recommended for washing soft toys)
- Clean towels or a drying rack
Step 1: Sorting and Initial Inspection for Safety
Before any cleaning begins, you must inspect every item. This step is critical for both safety and determining the correct cleaning method.
1.1 Separate Toys by Material Type
Different materials require different cleaning approaches. Mixing methods can ruin toys or fail to sanitize them properly.
- Category A (Soft/Fabric): Stuffed animals, rope toys, tennis balls, and fabric chews.
- Category B (Hard/Non-Porous): Rubber balls, plastic puzzle toys, nylon bones, and hard vinyl items.
1.2 Check for Damage and Potential Hazards
Thoroughly examine each toy for wear and tear. A damaged toy is a choking hazard, regardless of how clean it is.
- Look for tears in seams, especially on stuffed toys. If stuffing is coming out, the toy should be discarded.
- Check hard plastic or rubber toys for deep cracks, sharp edges, or pieces that are about to break off.
- Remove any batteries from interactive toys before washing.
If a toy is heavily damaged or irreparable, it’s best to throw it away. Even the deepest cleaning cannot fix structural integrity.
According to the Centers for Disease Control and Prevention (CDC), cleaning and disinfecting pet supplies, including toys, is crucial for preventing the spread of germs and protecting both human and animal health. Cleaning and Disinfecting Pet Supplies This confirms that cleaning is not just about odor, but about serious hygiene.
Step 2: Pre-Treatment and Preparation
Stubborn odors often cling to caked-on residue. Pre-treating helps loosen this grime and makes the deep deodorizing soak more effective.
2.1 Rinse Off Surface Debris
Hold hard plastic and rubber toys under warm running water. Use your fingers or a soft cloth to rub off visible dirt, mud, or dried saliva.
For soft toys, gently shake or brush off any loose hair, dirt, or debris before wetting them.
2.2 Address Sticky Spots with Mild Soap
If you find particularly sticky or greasy spots (often from treats or dried food), apply a tiny drop of mild, unscented dish soap directly to the area.
Use your scrub brush or toothbrush to gently work the soap into the residue. Rinse thoroughly immediately after scrubbing to avoid leaving soap residue behind.
This preparation ensures the primary deodorizing agents (vinegar and baking soda) can penetrate the material itself, reaching the source of the persistent smell.
Step 3: Deodorizing Hard, Non-Porous Toys (Rubber, Plastic, Nylon)
Hard toys are the easiest to sanitize because they can withstand submersion and scrubbing. Our primary method here relies on the natural disinfecting and deodorizing power of white vinegar.
3.1 Prepare the Vinegar Soaking Solution
Vinegar is acidic, which naturally breaks down the odor-causing bacteria and proteins left by pet saliva and food. It’s also completely safe once rinsed.
- Fill your bucket or basin with hot water (as hot as your tap allows).
- Add white distilled vinegar in a 1:4 ratio (1 part vinegar to 4 parts water). For example, if you use 4 cups of water, add 1 cup of vinegar.
3.2 Submerge and Soak
Place all hard toys into the vinegar solution, ensuring they are fully submerged. Use a plate or small weight to keep buoyant toys underwater if necessary.
Allow the toys to soak for a minimum of 30 minutes, or up to 2 hours for extremely smelly items.
This soaking time allows the vinegar to neutralize deeply embedded odors that surface rinsing missed. This method is often cited in pet hygiene guidelines as a safe alternative to harsh chemicals.
Research from PetMD emphasizes the importance of routine cleaning, noting that pet toys should be sanitized every few weeks, not just when they start smelling bad, to maintain a healthy environment. 10 Pet Hygiene Tips You Should Be Following Regular cleaning prevents odors from becoming ingrained.
3.3 Scrubbing and Final Rinse
After soaking, use your scrub brush to scrub the exterior of each toy, paying special attention to crevices, seams, and textured surfaces where bacteria hide.
Thoroughly rinse every toy under clean, cold running water. This step is crucial to remove any lingering vinegar scent. While vinegar is non-toxic, many pets dislike the smell, and a strong residual odor might discourage them from playing with the toy.
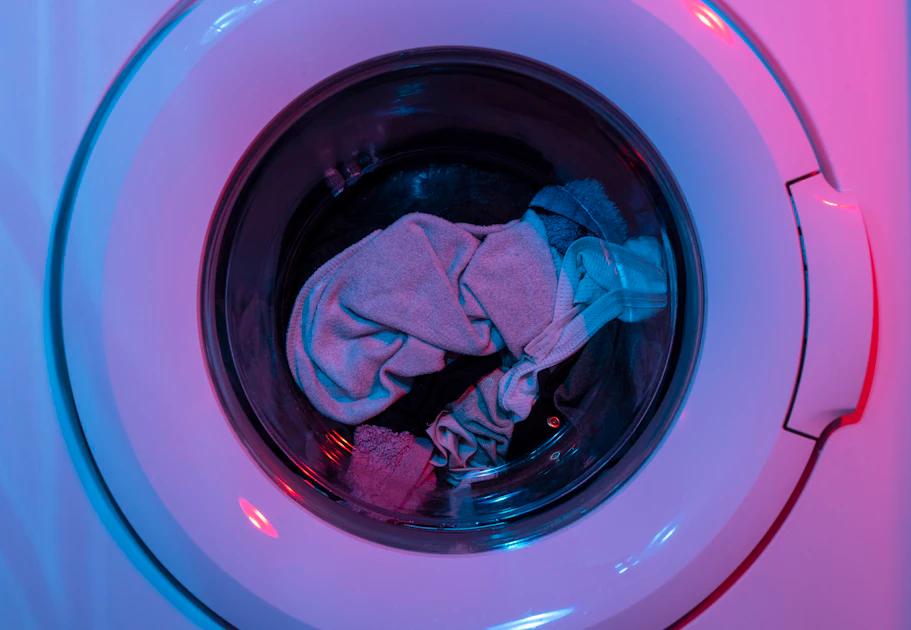
Step 4: Deep Cleaning and Deodorizing Soft Toys (Stuffed, Rope, Fabric)
Soft toys require more delicate handling, but they are often the biggest culprits for holding onto foul odors because they absorb moisture and saliva deeply.
4.1 Bagging for Protection
Place all soft toys (stuffed animals, fabric chews, rope toys) inside a mesh laundry bag or an old pillowcase tied shut.
This protects the toys from the machine’s agitation, preventing seams from ripping and preserving the toy’s shape.
4.2 The Washing Machine Cycle
Use a washing machine set to a gentle cycle using cold or warm water (never hot, which can melt plastic components or shrink fabric).
Instead of standard detergent, which can contain strong perfumes and chemicals potentially harmful to pets, use a capful of white distilled vinegar and a small amount of mild, unscented, pet-safe detergent (or just the vinegar).
Expert Tip: The ASPCA warns pet owners to be mindful of household products and cleaning agents, as many contain toxins that can be harmful if ingested by pets. Pet Poisons: Be Mindful of these Household Products and … Using vinegar and pet-specific cleaners minimizes this risk significantly.
4.3 Rope Toy Specifics
Rope toys are notorious for trapping odor deep within their fibers. After the washing machine cycle, consider a dedicated baking soda soak.
- Fill a small basin with water.
- Stir in 1/2 cup of baking soda until dissolved.
- Soak the rope toy for 1 hour.
- Rinse until the water runs clear and no residue remains.
Step 5: The Power of Baking Soda (Targeting Extreme Odors)
If the vinegar soak or washing machine cycle didn’t entirely eliminate the smell, baking soda (sodium bicarbonate) is your next line of defense. It chemically neutralizes acids and absorbs odors rather than masking them.
5.1 The Baking Soda Paste Scrub
This method is perfect for hard plastic or rubber toys with deeply ingrained smells, like those from dried vomit or anal gland secretions.
- Mix baking soda with just enough water to form a thick, spreadable paste.
- Apply the paste liberally over the entire surface of the hard toy.
- Work the paste into any grooves, textures, or seams using your scrub brush.
5.2 The Dry Soak Method for Soft Toys
For soft toys that cannot be tumble-dried or need extra odor extraction, use the dry soak method.
- Place the dry, clean soft toy (post-washing) into a large Ziploc bag or sealed container.
- Pour 1/4 to 1/2 cup of dry baking soda over the toy.
- Seal the bag and shake vigorously to coat the toy completely.
- Let the toy sit in the sealed bag for at least 12 hours, or ideally 24 hours.
- After the deodorizing period, remove the toy and thoroughly shake or vacuum off all residual baking soda powder. This powder has absorbed the odors.
Step 6: Critical Drying Procedures
Improper drying is the fastest way to replace a bacterial smell with a musty, mildew odor. This step is non-negotiable.
6.1 Drying Hard Toys
Hard rubber, plastic, and nylon toys should be dried immediately after rinsing.
- Towel-dry them first to remove excess water.
- Place them on a drying rack or clean towel in a well-ventilated area, preferably in direct sunlight.
Sunlight is a natural sanitizer and helps ensure rapid drying, killing any remaining surface germs.
6.2 Drying Soft Toys
Soft toys must be dried completely, inside and out, before being returned to your pet.
- Machine Drying: If the toy has no plastic eyes, hard squeakers, or glued components, you may tumble dry on the lowest heat setting or the air-only cycle.
- Air Drying (Recommended): If you must air dry, squeeze out as much excess water as possible. Hang them using clothespins or place them on a rack near a dehumidifier or fan. This can take 24–48 hours depending on the size of the toy.
Warning: Never give a pet a damp toy. Moisture trapped inside stuffing or rope fibers leads quickly to mold and mildew, which is harmful if ingested and creates a new, worse smell.
Advanced Techniques for Stubborn Toys
Some toys, particularly those with complex internal chambers like Kongs or puzzle feeders, require targeted cleaning.
Cleaning Puzzle and Food-Dispensing Toys
These toys often smell the worst because residual food and saliva ferment deep inside the chambers.
- Disassembly: Take apart any removable components.
- Hot Water Flush: Use a water bottle or small brush to force hot, soapy water through the internal holes and channels.
- Vinegar Soak: Submerge the disassembled pieces in the 1:4 vinegar solution (Step 3.1) for at least 60 minutes.
- Pipe Cleaner Scrub: Use pipe cleaners or specialized bottle brushes to physically scrub the interior walls of small openings.
Using Enzyme Cleaners
Enzyme cleaners are designed to break down organic matter (like urine, vomit, and saliva proteins). While usually reserved for carpets, they can be highly effective for deodorizing toys.
- Ensure the enzyme cleaner is specifically labeled as pet-safe and non-toxic.
- Spray the cleaner onto the toy, ensuring it saturates the smelly area.
- Allow it to sit for the manufacturer’s recommended time (usually 15-30 minutes).
- Rinse thoroughly with clean water, followed by a final rinse in the vinegar solution to ensure no chemical residue remains.
Steam Cleaning for Sanitization
If you own a handheld steam cleaner, this is an excellent, chemical-free way to sanitize and deodorize hard toys.
- Clean the toy first (Steps 1 and 2).
- Pass the steam wand slowly over the entire surface of the hard toy.
- The heat from the steam kills bacteria and releases trapped odors.
- Wipe the toy dry immediately with a clean towel.
Guidelines published by the CDC provide a visual guide for cleaning pet supplies, recommending hot water and scrubbing for hard, non-porous items to ensure proper disinfection. Cleaning and Disinfecting Pet Supplies This reinforces the need for physical scrubbing alongside chemical deodorization.
Common Mistakes to Avoid When Cleaning Pet Toys
Even with the best intentions, certain cleaning errors can negate your efforts or, worse, harm your pet.
Mistake 1: Using Chlorine Bleach or Harsh Disinfectants
While bleach kills germs, it is highly toxic if ingested. Even thoroughly rinsing a porous toy may leave residual chemicals that can cause serious illness when chewed.
Solution: Stick exclusively to natural deodorizers like vinegar and baking soda, or use mild, pet-specific enzyme cleaners.
Mistake 2: Insufficient Rinsing
If you use soap or vinegar, but don’t rinse thoroughly, the residual taste or smell will prevent your pet from using the toy. Worse, they might ingest the leftover residue.
Solution: Rinse twice. After the main rinse, hold the toy under running water for an extra 30 seconds, squeezing soft toys to ensure the water runs completely clear.
Mistake 3: Skipping the Inspection Step
Cleaning a toy that is already structurally compromised is a waste of time and creates a safety hazard. If a soft toy is already ripped, the washing machine will destroy it.
Solution: Be ruthless about inspection. If a toy is damaged, discard it before starting the cleaning process.
Mistake 4: Air Drying Indoors in High Humidity
Attempting to dry thick, soft toys in a humid basement or poorly ventilated room guarantees mildew growth.
Solution: Use fans, dehumidifiers, or direct sunlight to speed up the drying process. A toy must be bone-dry before play resumes.
Tips for Maintaining Freshness and Reducing Odor
Preventative measures are easier than intensive deodorizing treatments.
- Rotate Toys: Keep a few toys available at a time and put the others away. This reduces the saturation of saliva and grime, giving you time to clean the stored toys.
- Quick Daily Rinse: For hard toys, give them a quick rinse under hot water every evening to wash away surface saliva before it dries and hardens.
- Use Stainless Steel Buckets: When storing clean toys, avoid plastic containers which can sometimes hold onto or transfer plastic-y smells. Stainless steel is non-porous and easy to sanitize.
- Check Squeakers: If a squeaker stops working, it often means water has gotten inside and it might start harboring mildew. If you can’t remove and dry it, consider discarding the toy.
Frequently Asked Questions About Pet Toy Deodorizing
Watch: Little Live Pets My Puppy's Home Interactive Plush Toy Puppy and Kennel #shorts #toyunboxing
How often should I clean my pet’s toys?
The frequency depends on the type of toy and how heavily it is used. Hard plastic and rubber toys used daily should receive a deep deodorizing treatment every two to four weeks, with a quick rinse daily. Soft, stuffed toys should be machine-washed every week to ten days, especially if your pet slobbers heavily or takes the toy outside.
Can I use essential oils to make the toys smell better?
No, essential oils should generally be avoided on pet toys. Many essential oils, even when diluted, are toxic to pets, especially cats, if ingested or absorbed through the skin. They can cause liver damage or other serious health issues. The goal is odor removal using neutral ingredients like baking soda, not odor masking with fragrances.
Is it safe to put tennis balls in the washing machine?
Yes, tennis balls can be washed in the washing machine using the same gentle cycle and mesh bag method as soft toys. However, note that the abrasive nature of the felt on tennis balls means they wear out quickly. If the felt is peeling off or heavily damaged, discard the ball before washing, as the exposed rubber core can be a choking hazard.
What if my dog chews on non-chewable items, like household sponges?
If your pet has access to household items, ensure those items are free from chemical residue. Cleaning supplies like sponges, mops, or rags should be stored securely. If they manage to chew an item, immediately check the ASPCA’s list of toxic products and contact your veterinarian if you suspect ingestion of a hazardous chemical.
Why does my dog’s favorite toy smell worse than the others?
Your dog’s favorite toy likely carries the highest concentration of their natural scent, saliva, and residual food particles because they use it the most. Furthermore, some dogs use specific toys as comfort objects, burying them or storing them in hidden spots where moisture and bacteria thrive. This requires more frequent and longer deodorizing soaks (e.g., a full 2-hour vinegar soak and the full 24-hour baking soda dry soak).
Conclusion
You have successfully learned how to deodorize pet toys using proven, non-toxic methods that prioritize your pet’s safety while effectively eliminating stubborn odors. By implementing a routine cleaning schedule—and relying on the powerful duo of vinegar and baking soda—you ensure that your pet’s playtime is not only fun but also hygienic. Keep up the great work, and enjoy the smell of fresh, clean toys!