
It happens every time. You spend an hour washing your car, meticulously scrubbing every panel, only to see ugly, spiderweb-like swirl marks in the sunlight afterward. It’s frustrating, and it makes you feel like you wasted your time.
The truth is, most people are taught to wash a car incorrectly, relying on dish soap and improper tools. This comprehensive car wash guide is here to fix that.
We’re going beyond the basics and diving into the techniques professionals use to achieve a flawless finish every time. You don’t need expensive gear; you just need the right process. Ready to master the wash bay?
Why Swirl Marks Happen (And How to Stop Them)
Swirl marks—those micro-scratches that spiderweb across your paint—aren’s caused by magic. They are caused by bad technique and poor grit management.
Every time your washing tool touches the paint, it picks up microscopic dirt, sand, and road grime. If you put that dirty tool back into the same soap bucket, you’ve just contaminated your wash water. You’re essentially dragging fine sandpaper across the clear coat.
The secret to a scratch-free wash is simple: isolate the dirt.
Essential Gear for a Flawless Wash
Before you start scrubbing, you need the right arsenal. Ditch the old sponges and household towels. These items trap dirt and cause damage.
The Must-Have Tools
- Two Buckets and Grit Guards: The namesake of the best washing method. One bucket is for clean, soapy water; the other is for rinsing your mitt. Grit guards sit at the bottom of the rinse bucket, trapping dirt so it doesn’t float back up to contaminate your mitt.
- pH-Neutral Car Wash Soap: This is non-negotiable. Household detergents strip away wax, sealants, and often damage paint finishes over time. A dedicated, pH-neutral car soap is gentle and effective.
- Microfiber Wash Mitts: These are vastly superior to sponges. They lift dirt up and away from the paint surface, minimizing friction.
- Dedicated Wheel/Tire Brushes: Wheels harbor the most aggressive brake dust and road grime. You never want to use the same tool you use on your wheels on your paint.
- Drying Towels: A dedicated microfiber drying towel or a waffle-weave towel is key. Air drying causes water spots, especially in direct sunlight.
The Step-by-Step DIY Car Wash Guide
This method focuses on efficiency, safety, and preventing damage. Remember: always wash your car out of direct sunlight to prevent soap and water from drying prematurely.
H3: Prep Work: Wheels First
Always start with the dirtiest part of the vehicle: the wheels and tires. They contain harsh, corrosive brake dust that you don’t want near your paint.
- Rinse the wheels thoroughly to remove loose surface dirt.
- Apply a dedicated, non-acidic wheel cleaner. Let it dwell for the instructed time.
- Use dedicated brushes (a soft tire brush, a barrel brush for the inner rim) to agitate the grime.
- Rinse completely. Once the wheels are clean, you can move to the paint.
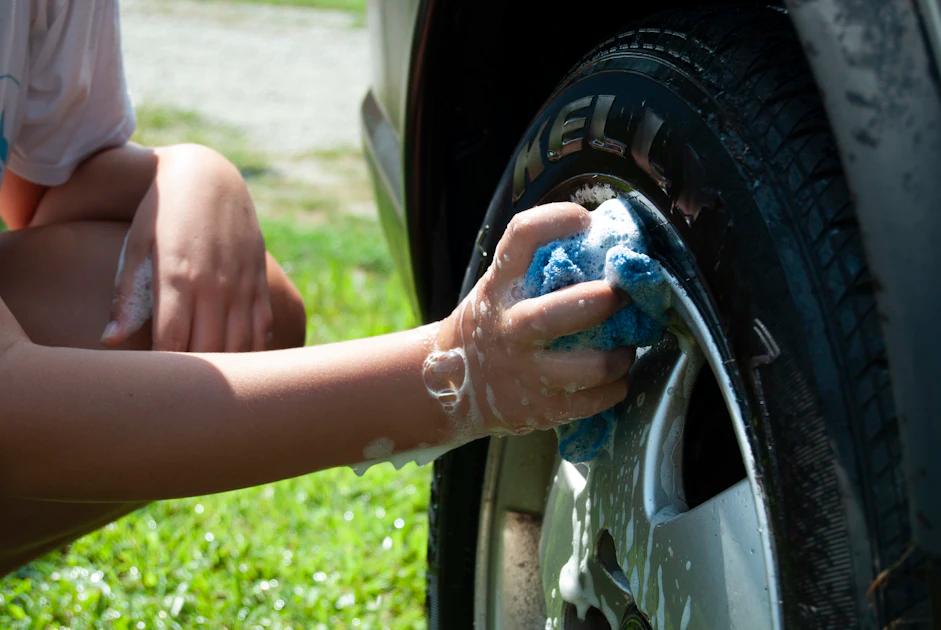
H3: Executing the Two-Bucket Wash
This is the core technique that separates experts from beginners.
- Pre-Rinse: Thoroughly spray down the entire car from top to bottom. Use a strong stream to remove loose contaminants like dust and pollen. This drastically reduces the dirt your mitt has to deal with.
- Soak the Mitt: Dip your microfiber mitt into the soap bucket.
- Wash Panels: Always wash the vehicle in small sections, working from the top down. Start with the roof, then the windows, then the upper body panels (hood, trunk).
- Rinse & Reload: After washing one panel (or a small section), immediately dunk the mitt into the rinse bucket. Scrub it vigorously against the grit guard at the bottom. This strips the dirt out of the mitt.
- Repeat: Squeeze out the dirty water, dip the clean mitt back into the soap bucket, and move to the next section.
Expert Tip: Save the lower doors, rocker panels, and bumpers—the dirtiest areas—for last. If possible, use a second, separate mitt dedicated only to these bottom sections.
The Critical Drying Phase
Drying is where many people mess up and cause water spots or new scratches. If you let water evaporate naturally, the minerals in the water stay behind, creating hard spots.
- Sheeting: After the final rinse, take the nozzle off your hose and let the water flow gently over the panels. This “sheeting” action encourages most of the water to run off, minimizing the water left to dry.
- Wipe Down: Use your large microfiber drying towel. Lay the towel flat on a panel, and gently pull it across the surface. Avoid aggressive scrubbing. Let the towel absorb the water. A good towel often only needs to be used for blotting.
- Finish: Open the doors, trunk, and hood and quickly wipe down the jambs where water tends to hide and drip out later.
Practical Tips for Your Next Wash
Applying these small adjustments makes a huge difference in the final outcome and protection of your paint.
- Stay Cool: Never wash in direct, hot sunlight. The heat accelerates drying, guaranteeing water spots before you can rinse them away.
- Filter Your Water: If you live in an area with extremely hard water, consider using an inline water filter (like a deionizer) for the final rinse. This eliminates minerals that cause spotting.
- Apply Protection: Washing is only half the battle. Immediately after drying, apply a quick detail spray or spray sealant. This adds gloss and makes future washes significantly easier.
- Don’t Forget the Details: Use a dedicated glass cleaner and separate microfiber towel for windows to avoid streaking, and ensure your tires get a dedicated dressing product for a crisp, finished look.
FAQ: Your Car Wash Questions Answered
Can I really not use dish soap for washing my car?
Absolutely not. Dish soap (like Dawn) is engineered to strip grease and oils—and that includes the protective waxes and sealants on your paint. Using dish soap repeatedly leaves your clear coat exposed to UV damage and harsh environmental fallout, leading to premature fading.
How often should I wash my car?
If the car is driven daily, aim for every 1–2 weeks. Consistency is more important than duration. Allowing heavy road salt, bird droppings, or bug guts to sit on the paint for weeks will cause etching that even a perfect wash can’t fix.
What is a clay bar, and do I need one?
A clay bar isn’t part of a routine wash, but it’s essential for deep cleaning 1–2 times a year. It physically pulls bonded contaminants (like brake dust fallout or rail dust) that washing alone cannot remove. If your paint feels rough, you need to clay bar before you wax.
The Shine Starts Now
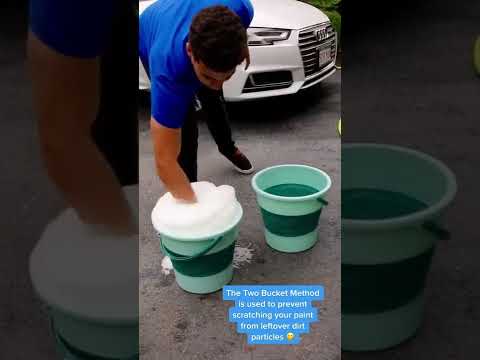
Watch: Two Bucket Method #cars #cardetail #carwash
Mastering the perfect wash is a foundational skill. It’s not about expensive gadgets; it’s about understanding how to manage grit and minimize friction. By adopting the two-bucket method and committing to pH-neutral soap, you’ve taken the biggest step toward preserving your vehicle’s finish.
Keep these techniques consistent, and you’ll start seeing that deep, reflective shine you always wanted, without the disappointing swirl marks. Now go grab those buckets and get cleaning!